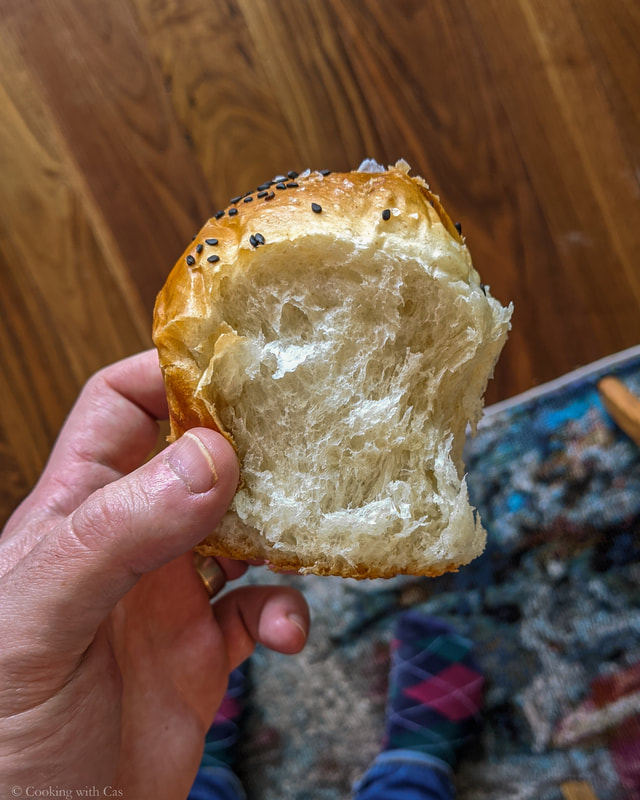
Hokkaido milk buns are much unlike the traditional dinner roll you'd find at a potluck or Thanksgiving meal, which are often an offshoot of brioche or brioche-like doughs, these soft buns from Japan make a wonderful centerpiece due to their texture, richness, and flavor. They are also are easier to execute to bring the emulsion of flour, milk, and fat together compared to brioche, as the fat is incorporated as a liquid.
|
Japanese shokupan and other East Asian breads rely on the use of a water roux (湯種), known as a Tangzhong (alternatively a Yudane for a slightly different water::flour ratio) to retain a wonderfully soft texture well after baking due to the water retentive properties of pre-gelatinized starch. As it applies to bread dough after baking, the matrix of denatured proteins and the gluten network of the dough literally trap water inside and slow down evaporation over time. Tangzhong methods can be added/adapted to many enriched doughs to improve their texture (think cinnamon rolls in brioche-like methods), and only require about 10% (by weight) of the flour in the total dough to be fully activated.
Some recipes for shokupan or milk breads call for the addition of milk powder for an even richer texture, but we're going with a high fat coconut milk in lieu of that (look in your local Asian market for Aroy-D or even Chaokoh for the thicker texture and higher fat content). I like to knead this bread by hand, even if it is very sticky because it gives you a little more feedback for overkneading, which will result in a shorter, denser crumb instead of the fluffy texture you'd expect. Note that this recipe can also be adapted to a standard loaf or pullman tin for better slicing, just adjust the size of shaped portions accordingly. Shopping List (Tangzhong/Water Roux):
|
|
Prep (Tangzhong & Topping):
Mix the sesame and poppy seeds. Set aside. Put in a shaker jar. They'll keep, as you might imagine.
In the nonstick skillet over low heat, whisk together the tangzhong ingredients until well combined and whisk constantly until *just* gelatinized and thickened. If you've made creme patisserie or a stovetop pudding, it should have a similar 'set' texture but not completely solidified and goopy. Aim for a loose mashed potato consistency. Wheat flour and its starches gelatinize at around 150 deg F, so try not to go too far above this threshold as you don't want a paste. Set this aside and allow to cool to room temperature (it may kill the yeast if you try to introduce it the dough while hot).
Prep (Hokkaido Bun):
In a large bowl, combine the dry ingredients with the tangzhong, coconut milk, 1 egg, yeast (plus any sourdough starter), and melted "butter" until just combined. We aren't really autolyzing this dough because it *is* enriched and has the tangzhong starter, but it will be very sticky as you work it. I will generally oil my hands and work surface lightly as I knead, and I suggest you do the same, and remember to work slowly - overkneading will result in a tight crumb. If it is completely unworkable, feel free to add more flour (make sure it's AP flour) and knead until smooth (see image below).
After a solid 10-15 minutes of kneading and working by hand, the dough should be smooth, very elastic, and should easily pass a windowpane test when pulled thin. Generously oil (using coconut oil, canola oil, your choice really) a container or bowl to ferment the dough, tightly cover with plastic wrap and leave it at room temperature for about 90 minutes (will change depending on ambient temperature).
Once risen and nearly doubled in volume, degas the dough and divide into 8 equal portions. I did not weigh the resulting pieces, so use your best judgement, and by that I mean eyeball it and get close, they'll all proof to fill the pan anyway. There's a Bob Ross Happy Little Shokupan joke here.
Using a lightly oiled rolling pin, roll each portion into a rectangular strip, and roll up on one end and pinch into a tight ball. Alternatively you can roll and use your work surface and a cupped hand to make a smooth, tight ball. Either one works. Place each ball into a well-greased baking tin (I used room temperature coconut oil), and cover with oiled plastic wrap (so it doesn't stick to the dough as it rises) to proof for 45-50 minutes. The buns should fill in most of the space and double in size in this time (see images below). If you are going the loaf route, wait until the dough rises *just* to the rim of the loaf pan, because it will oven spring even further.
Preheat your oven to 385 deg F.
The Business (the bake):
Uncover the buns. Beat remaining egg with a splash of coconut milk (or water) and liberally brush with your egg wash mixture and optionally sprinkle with seed mixture and flaky sea salt.
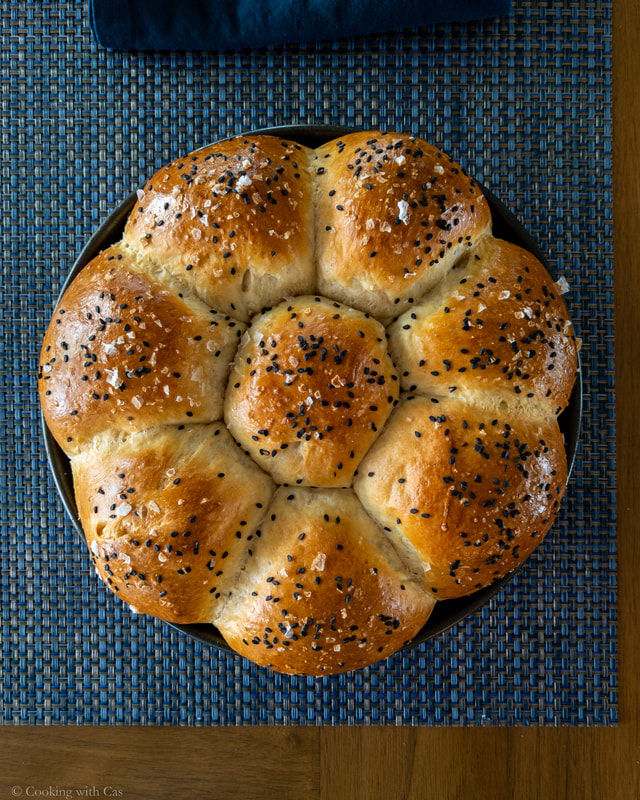
Bake for 28-32 minutes (if baking with other items in the oven at 350 deg F, you will need to bake for ~40 minutes), or until deeply golden and shiny (thanks egg wash). I tend to let these cool completely before serving. You can optionally try to remove them from the baking tin and place onto a cooling rack to prevent sogginess, but if you can't keep the mass of bread whole, you won't get the satisfying 'pull' when you serve it. It's completely up to you, though!
Enjoy!
Mix the sesame and poppy seeds. Set aside. Put in a shaker jar. They'll keep, as you might imagine.
In the nonstick skillet over low heat, whisk together the tangzhong ingredients until well combined and whisk constantly until *just* gelatinized and thickened. If you've made creme patisserie or a stovetop pudding, it should have a similar 'set' texture but not completely solidified and goopy. Aim for a loose mashed potato consistency. Wheat flour and its starches gelatinize at around 150 deg F, so try not to go too far above this threshold as you don't want a paste. Set this aside and allow to cool to room temperature (it may kill the yeast if you try to introduce it the dough while hot).
Prep (Hokkaido Bun):
In a large bowl, combine the dry ingredients with the tangzhong, coconut milk, 1 egg, yeast (plus any sourdough starter), and melted "butter" until just combined. We aren't really autolyzing this dough because it *is* enriched and has the tangzhong starter, but it will be very sticky as you work it. I will generally oil my hands and work surface lightly as I knead, and I suggest you do the same, and remember to work slowly - overkneading will result in a tight crumb. If it is completely unworkable, feel free to add more flour (make sure it's AP flour) and knead until smooth (see image below).
After a solid 10-15 minutes of kneading and working by hand, the dough should be smooth, very elastic, and should easily pass a windowpane test when pulled thin. Generously oil (using coconut oil, canola oil, your choice really) a container or bowl to ferment the dough, tightly cover with plastic wrap and leave it at room temperature for about 90 minutes (will change depending on ambient temperature).
Once risen and nearly doubled in volume, degas the dough and divide into 8 equal portions. I did not weigh the resulting pieces, so use your best judgement, and by that I mean eyeball it and get close, they'll all proof to fill the pan anyway. There's a Bob Ross Happy Little Shokupan joke here.
Using a lightly oiled rolling pin, roll each portion into a rectangular strip, and roll up on one end and pinch into a tight ball. Alternatively you can roll and use your work surface and a cupped hand to make a smooth, tight ball. Either one works. Place each ball into a well-greased baking tin (I used room temperature coconut oil), and cover with oiled plastic wrap (so it doesn't stick to the dough as it rises) to proof for 45-50 minutes. The buns should fill in most of the space and double in size in this time (see images below). If you are going the loaf route, wait until the dough rises *just* to the rim of the loaf pan, because it will oven spring even further.
Preheat your oven to 385 deg F.
The Business (the bake):
Uncover the buns. Beat remaining egg with a splash of coconut milk (or water) and liberally brush with your egg wash mixture and optionally sprinkle with seed mixture and flaky sea salt.
Bake for 28-32 minutes (if baking with other items in the oven at 350 deg F, you will need to bake for ~40 minutes), or until deeply golden and shiny (thanks egg wash). I tend to let these cool completely before serving. You can optionally try to remove them from the baking tin and place onto a cooling rack to prevent sogginess, but if you can't keep the mass of bread whole, you won't get the satisfying 'pull' when you serve it. It's completely up to you, though!
Enjoy!
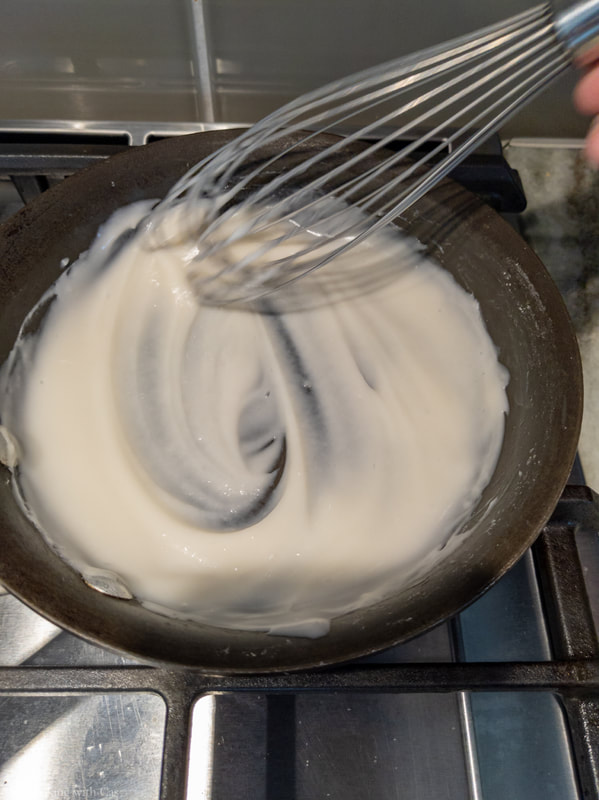
Desired consistency for tangzhong starter. Ignore the blurry whisk, I am a professional.
|
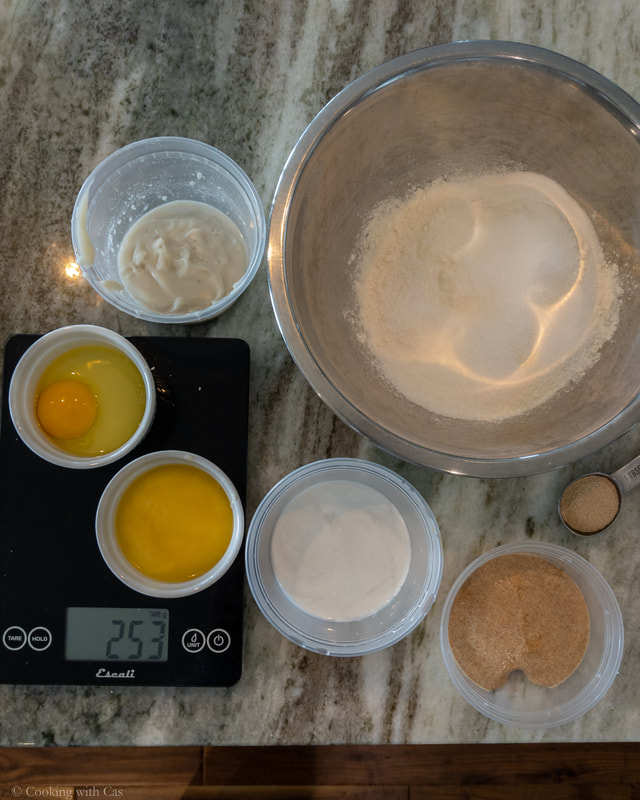
Hey look, it's the ingredients, working from the top left going clockwise: tangzhong, bread flour, active-dry yeast, sourdough starter, coconut milk, melted "butter", whole egg.
|
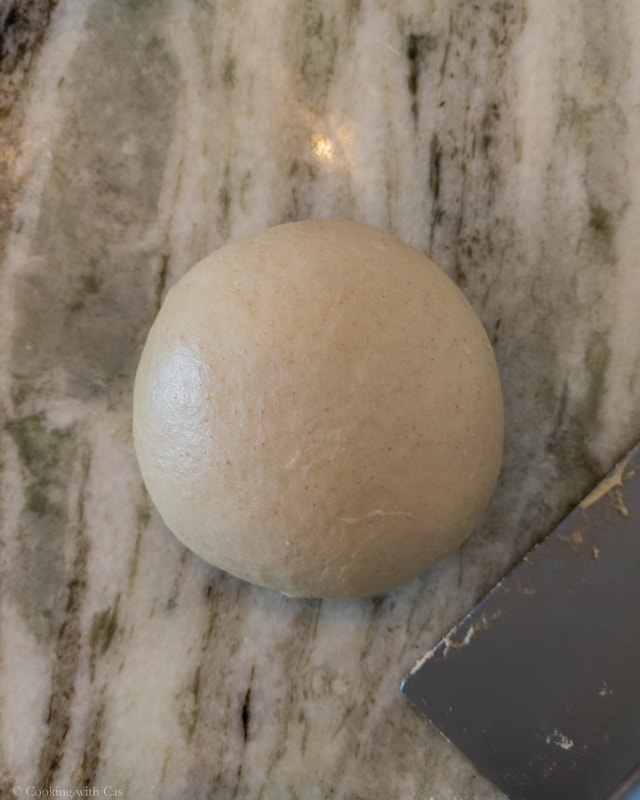
Goal smoothness after a solid 15 minutes of kneading and shaping.
|
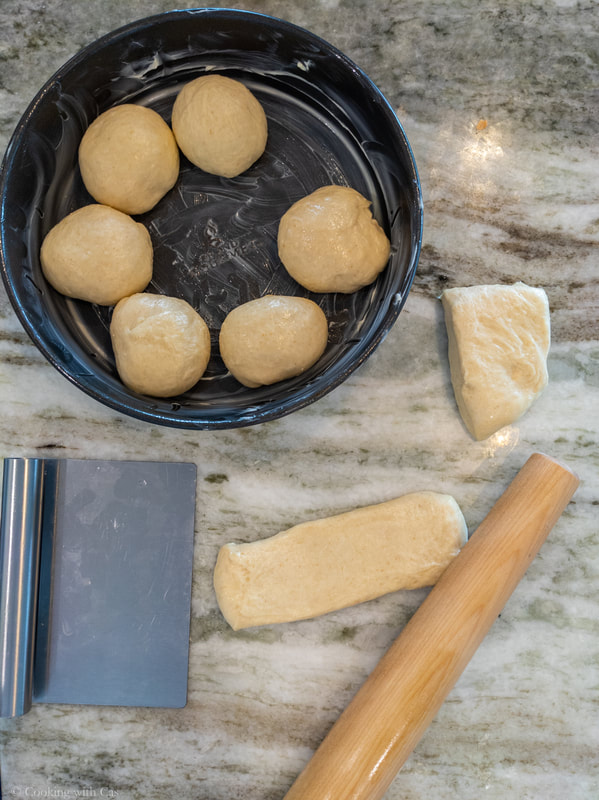
Assembling and rolling out portions of dough. If I were a good blogger, I would have showed how to actually roll them, so just use your imagination.
|
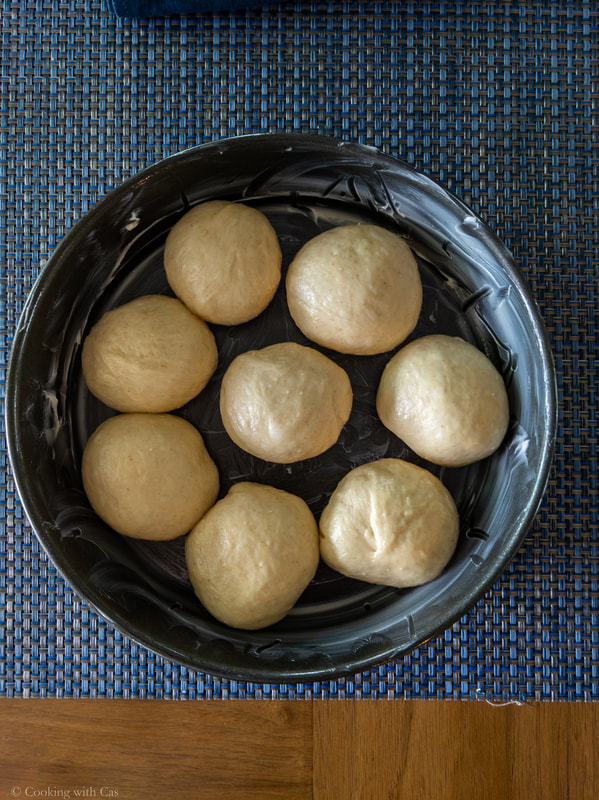
Before final proof.
|
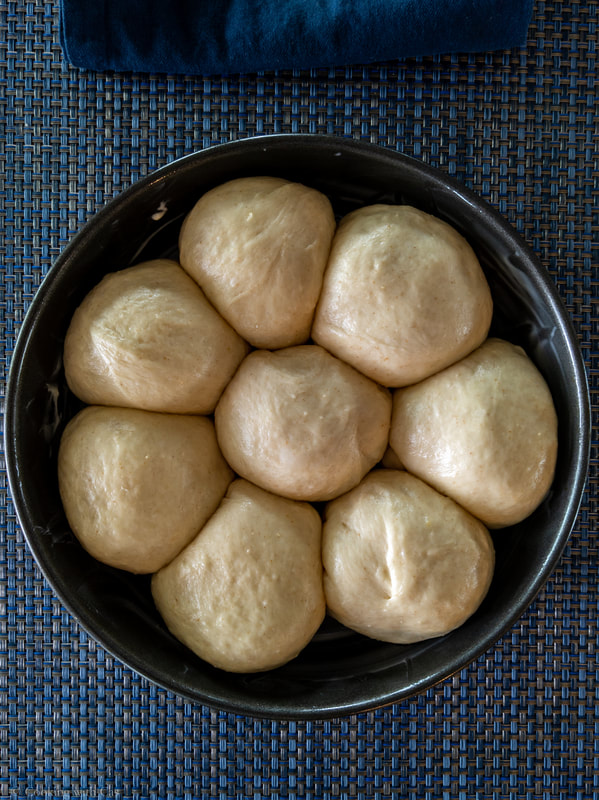
After final proof.
|