Historically, full crusted pies and tarts had a high barrier of entry, so much so, that companies have developed ready-made pie crusts that you basically add your own filling into and bake for a no-fuss centerpiece dessert.
|
Key lime pie is one of those oft-remembered desserts at summertime potlucks for its crisp, tart flavors and healthy dollops of whipped topping (the fake stuff). You also recall it being somewhat underwhelming, as if someone slapped lime pudding into a pre-made graham cracker crust and called it a day (I will let you decide if this is actually true). We're ditching almost every aspect of this incantation of the key lime pie to align it more with a refined look, taste, and texture.
Admixtures of whole wheat flour in your pastry allows it to be more crumbly, as it is less prone to over-working as you bring the crust together; you've been there, the tough pastry crust that you need a serrated knife to get through. This is more reminiscent of graham crackers in texture without needing to open a box (save them for s'mores, y'all), but DOES require a blind bake of your crust. However, I've thought about this process, so hear me out: you need a decent amount of sugar to make a meringue topping, so why not use toasted sugar that you've used as a pie weight? If you are using a fluted tart pan, it can be difficult to get even coverage of the pie weights into each nook, but the sugar will form to the shape much better. Plus, it becomes toasted, so you have a slight caramel edge to your meringue. Depth of flavor, and all. Shopping List (Key Lime Crème Pâtissière):
|

|
Prep (Whole Wheat Pastry):
Whisk the dry ingredients together. Toss in the lard cubes and quickly rub them into the flour mixture with your fingertips, you're looking for a relatively streaky pastry here (yeah, it's basically a Stella Parks method if you have experience with that). Look for that slightly wet sand texture, but don't overwork it.
Slowly drizzle in the ice water until the dough just comes together into a shaggy ball. Again, don't overwork this because you'll want very crumbly pastry to resemble that of a graham cracker crust (which in theory won't happen due to the whole wheat flour). Turn out onto a well floured surface and roll into a roughly 10"x15" rectangle. Take the shorter ends and perform a pseudo-book-fold of your pastry (fold the ends to the center and then the ends together again. You could, in theory, do this multiple times for a more flaky pastry, but for the effort, a single book fold will do just fine.
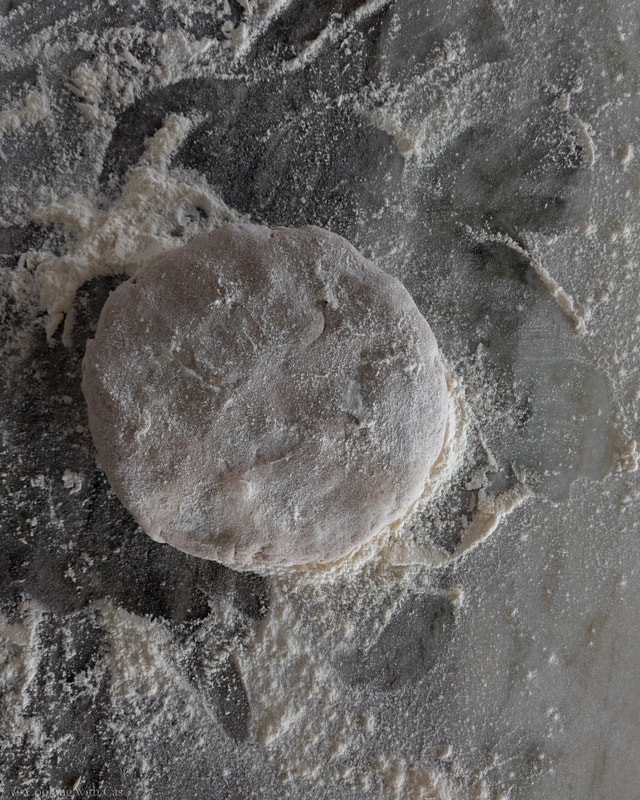
Form the dough into a shape of a thick disk (yes, I have you make a rectangle and then smush it into a circle, sue me), wrap in plastic wrap and chill in the refrigerator for 10-20 minutes to hydrate the flour and allow it to become more pliable.
Preheat your oven to 350 deg F.
Using another well-floured surface and your cylindrical rolling device of choice, roll out the disk into a 12-14 inch circle roughly 1/4 inch thick, rotating as you roll it out to ensure the pastry isn't sticking to your work bench. Roll the pastry up on the rolling pin or wine bottle and trasnfer to your tart pan. Lower it in carefully, and let gravity do some of the work; the sharp edge of the tart pan will likely cut the pastry, but that isn't a huge issue - you can easily patch this with remnants. Using quick motions, push the pastry into the corners and crevices of the fluted tart pan, prick the bottom of the pastry in several places with a fork, and fill line with aluminum foil. Fill the aluminum foil reservoir with 400 g of granulated sugar, pushing into the sides to make good contact with the aluminum foil and blind bake the pastry for 30-35 minutes or until just starting to brown and crisp on the edge of the tart pan. Don't worry if the pastry shrinks too much, the curd will be set enough to not need a Hoover Dam equivalent to bake in.
Remove the aluminum foil and sugar, and reserve the now toasted sugar for your Swiss meringue.
You can leave the pastry to chill on the counter as you don't want it piping hot for the filling(s). Keep an eye on moisture if you decide to toss it in the fridge. You don't want to ruin the crisp pastry with water content.
Editor's note: this recipe will make roughly two pie crusts if you can roll it out thin enough, so use accordingly, bake a batch of pie crust wafers for snacking on (look don't judge me I've done it), or double up the rest of the recipe for two full pies. Your call.
Prep (Key Lime Crème Pâtissière):
Juice and zest those key limes. Grab a friend to help because this can get tedious.
This is by no means an authentic crème pâtissière; there's butter substitute, that's just inherently not French. Anyway, for the fâuxtissière, whisk the egg yolks and sugar together until the sugar looks dissolved and has lightened in color, and set aside. In the saucepot, whisk the coconut milk, key lime juice, zest, and both flours together. Over a medium-low heat, whisk this mixture constantly until it hits about 170 deg F. At this temperature, you will start to gelatinize the flours and begin the thickening process - which admittedly will happen relatively quickly with the tapioca flour admixture, so be sure to keep an eye on it. Once you have a hot mixture, take a few tablespoons of the proto-custard mixture and temper the eggs, that is, to whisk the small volume of hot liquid to slowly increase the temperature of the eggs without curdling them or making scrambled eggs. After a few tablespoons of tempering, you should be able to introduce the entire mixture together and place back on the heat to finish thickening. You want the mixture to get somewhere near 140 deg F, or until you start to meet resistance with the whisk.
While still warm, whisk in the cold pats of butter for a little extra richness and glossiness, and allow to fully incorporate before continuing.
Using the fine mesh sieve, pass the crème pâtissière to remove the lime zest - it has done its job by now, and this will also ensure you don't have any random clumps of flour.
Chill this in the fridge to set, pressing a layer of plastic wrap onto the surface to prevent a skin.
Prep (Swiss Meringue):
Weigh out your egg whites. You need a 2::3 egg white::sugar ratio to make this Swiss meringue (you should have about 190-200 g of egg whites and thus, roughly 300 g of sugar needed).
Take that saucepot, clean it, and place an inch of water in the bottom of it over medium heat to act as a double boiler. Grab a metal bowl and lightly whisk the egg whites to begin to coagulate them until just foamy. Place the double boiler over the heat and whisk vigorously, streaming in the reserved and measured sugar until soft peaks form. At this point you can sprinkle in the cream of tartar to help stabilize your meringue - the tartaric acid aids the proteins in egg whites stiffening), and you should now have a very glossy Swiss meringue. It will be sticky, which is good. Set this aside.
The Business (the bake):
Take your room temperature pie crust, the chilled fâuxtissière, and your meringue and assemble. Spread the fâuxtissière in the bottom of the pie crust so it is even (if it has set up too much, add roughly 1 Tbsp more of coconut milk to loosen it). Dollop the meringue on top of the crème and fluff with your offset spatula into any design you like. A dome can be classic or you can go with what I did with a more swirled and peaked look. Look, all pie is perfect, to borrow the pizza analogy. I like SOME irregularity because those little bits will brown up well in the oven and create toasted marshmallow-y bites.
Bake at 350 deg F for 25-30 minutes or until the meringue darkens in color and has crisped on the outside slightly. Remember, everything is already baked, so you're just curing it in the oven to coalesce into a nice pie package. You can optionally further toast the meringue further with a brulee torch or under your broiler, but definitely keep an eye on it as to not burn. Teddy bear brown, as they say.
Cool this slightly and slice with a hot, wet knife for clean slices. Enjoy!
Whisk the dry ingredients together. Toss in the lard cubes and quickly rub them into the flour mixture with your fingertips, you're looking for a relatively streaky pastry here (yeah, it's basically a Stella Parks method if you have experience with that). Look for that slightly wet sand texture, but don't overwork it.
Slowly drizzle in the ice water until the dough just comes together into a shaggy ball. Again, don't overwork this because you'll want very crumbly pastry to resemble that of a graham cracker crust (which in theory won't happen due to the whole wheat flour). Turn out onto a well floured surface and roll into a roughly 10"x15" rectangle. Take the shorter ends and perform a pseudo-book-fold of your pastry (fold the ends to the center and then the ends together again. You could, in theory, do this multiple times for a more flaky pastry, but for the effort, a single book fold will do just fine.
Form the dough into a shape of a thick disk (yes, I have you make a rectangle and then smush it into a circle, sue me), wrap in plastic wrap and chill in the refrigerator for 10-20 minutes to hydrate the flour and allow it to become more pliable.
Preheat your oven to 350 deg F.
Using another well-floured surface and your cylindrical rolling device of choice, roll out the disk into a 12-14 inch circle roughly 1/4 inch thick, rotating as you roll it out to ensure the pastry isn't sticking to your work bench. Roll the pastry up on the rolling pin or wine bottle and trasnfer to your tart pan. Lower it in carefully, and let gravity do some of the work; the sharp edge of the tart pan will likely cut the pastry, but that isn't a huge issue - you can easily patch this with remnants. Using quick motions, push the pastry into the corners and crevices of the fluted tart pan, prick the bottom of the pastry in several places with a fork, and fill line with aluminum foil. Fill the aluminum foil reservoir with 400 g of granulated sugar, pushing into the sides to make good contact with the aluminum foil and blind bake the pastry for 30-35 minutes or until just starting to brown and crisp on the edge of the tart pan. Don't worry if the pastry shrinks too much, the curd will be set enough to not need a Hoover Dam equivalent to bake in.
Remove the aluminum foil and sugar, and reserve the now toasted sugar for your Swiss meringue.
You can leave the pastry to chill on the counter as you don't want it piping hot for the filling(s). Keep an eye on moisture if you decide to toss it in the fridge. You don't want to ruin the crisp pastry with water content.
Editor's note: this recipe will make roughly two pie crusts if you can roll it out thin enough, so use accordingly, bake a batch of pie crust wafers for snacking on (look don't judge me I've done it), or double up the rest of the recipe for two full pies. Your call.
Prep (Key Lime Crème Pâtissière):
Juice and zest those key limes. Grab a friend to help because this can get tedious.
This is by no means an authentic crème pâtissière; there's butter substitute, that's just inherently not French. Anyway, for the fâuxtissière, whisk the egg yolks and sugar together until the sugar looks dissolved and has lightened in color, and set aside. In the saucepot, whisk the coconut milk, key lime juice, zest, and both flours together. Over a medium-low heat, whisk this mixture constantly until it hits about 170 deg F. At this temperature, you will start to gelatinize the flours and begin the thickening process - which admittedly will happen relatively quickly with the tapioca flour admixture, so be sure to keep an eye on it. Once you have a hot mixture, take a few tablespoons of the proto-custard mixture and temper the eggs, that is, to whisk the small volume of hot liquid to slowly increase the temperature of the eggs without curdling them or making scrambled eggs. After a few tablespoons of tempering, you should be able to introduce the entire mixture together and place back on the heat to finish thickening. You want the mixture to get somewhere near 140 deg F, or until you start to meet resistance with the whisk.
While still warm, whisk in the cold pats of butter for a little extra richness and glossiness, and allow to fully incorporate before continuing.
Using the fine mesh sieve, pass the crème pâtissière to remove the lime zest - it has done its job by now, and this will also ensure you don't have any random clumps of flour.
Chill this in the fridge to set, pressing a layer of plastic wrap onto the surface to prevent a skin.
Prep (Swiss Meringue):
Weigh out your egg whites. You need a 2::3 egg white::sugar ratio to make this Swiss meringue (you should have about 190-200 g of egg whites and thus, roughly 300 g of sugar needed).
Take that saucepot, clean it, and place an inch of water in the bottom of it over medium heat to act as a double boiler. Grab a metal bowl and lightly whisk the egg whites to begin to coagulate them until just foamy. Place the double boiler over the heat and whisk vigorously, streaming in the reserved and measured sugar until soft peaks form. At this point you can sprinkle in the cream of tartar to help stabilize your meringue - the tartaric acid aids the proteins in egg whites stiffening), and you should now have a very glossy Swiss meringue. It will be sticky, which is good. Set this aside.
The Business (the bake):
Take your room temperature pie crust, the chilled fâuxtissière, and your meringue and assemble. Spread the fâuxtissière in the bottom of the pie crust so it is even (if it has set up too much, add roughly 1 Tbsp more of coconut milk to loosen it). Dollop the meringue on top of the crème and fluff with your offset spatula into any design you like. A dome can be classic or you can go with what I did with a more swirled and peaked look. Look, all pie is perfect, to borrow the pizza analogy. I like SOME irregularity because those little bits will brown up well in the oven and create toasted marshmallow-y bites.
Bake at 350 deg F for 25-30 minutes or until the meringue darkens in color and has crisped on the outside slightly. Remember, everything is already baked, so you're just curing it in the oven to coalesce into a nice pie package. You can optionally further toast the meringue further with a brulee torch or under your broiler, but definitely keep an eye on it as to not burn. Teddy bear brown, as they say.
Cool this slightly and slice with a hot, wet knife for clean slices. Enjoy!
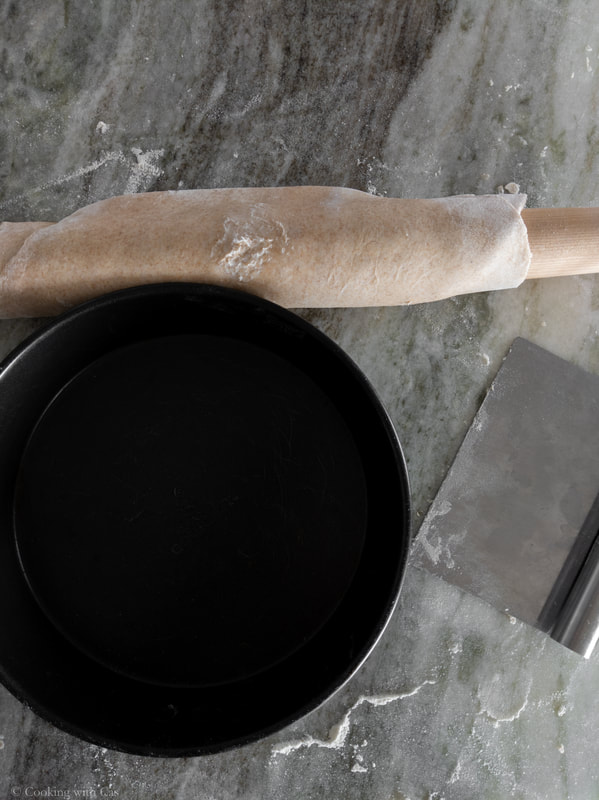
Rolling the pastry into a pie pan (I considered using the straight walled pan instead of the fluted pan and guess which picture I kept?)
|
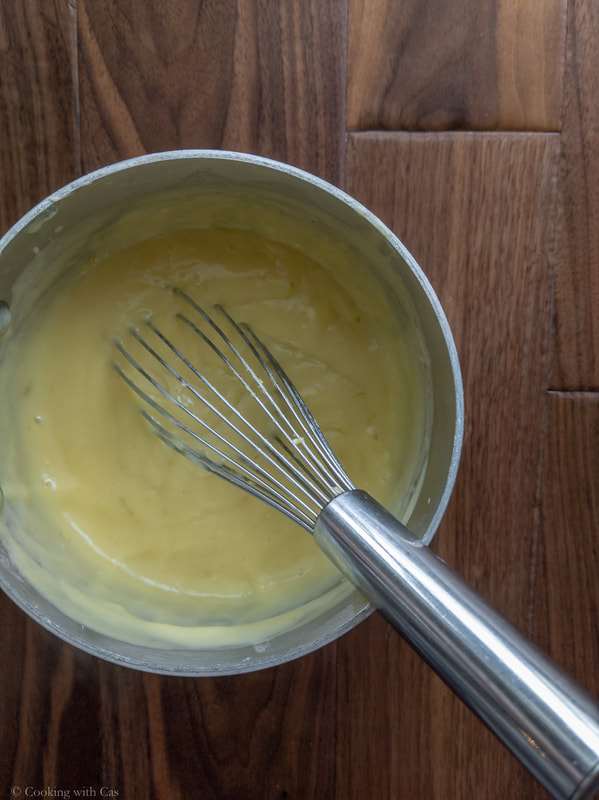
Roughly the viscocity of your creme pâtissière after tempering and gelatinizing.
|
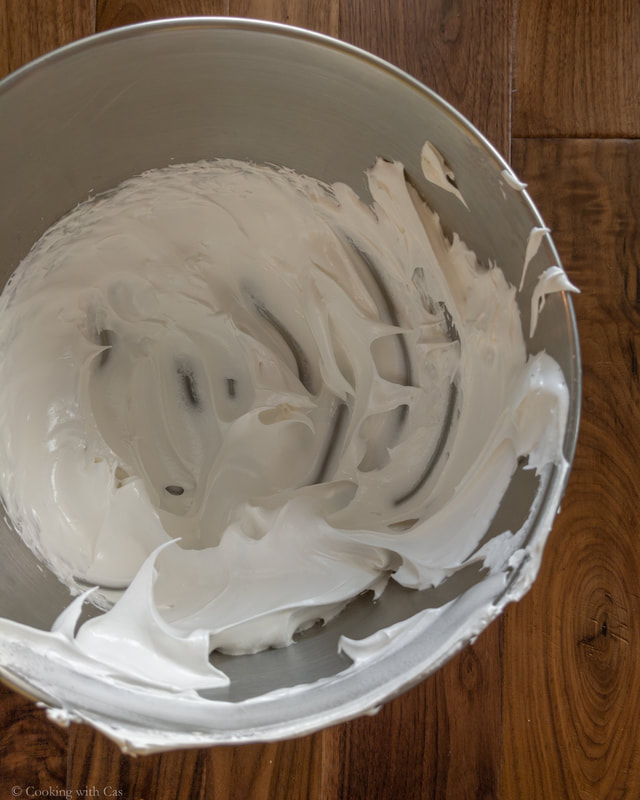
Meringue porn.
|