Full disclosure: I've learned a lot about bread making from Ken Forkish's Flour Water Salt Yeast; I've adapted one of my favorite recipes from his book and have made it a half a dozen times, adjusting as I go. If you're looking to get into bread - this is an excellent (yet compact) encyclopedic resource. It won a James Beard award for a reason. I just want to outline how I've taken the formula and experimented with the science.
|
Poolish (a type of wet pre-ferment, think a proto-sourdough) loaves strike a great middle ground between full artisan loaves using a months-old sourdough starter and the more traditional same-day speed bakes using conventional yeast and maybe a little autolyse time. When you first look at a recipe for poolish, it seems like there couldn't possibly be enough yeast to fully get a rise, but nearly half of the loaf is 'levain'; it also seems like a lot of work just for a single loaf - but rest assured, it's a lot of waiting, really. This method is great for those of you that dislike kneading a gluten network into the dough - the long pre-ferment encourages fast gluten development since half of your flour has been hydrated overnight.
The pre-ferment method allows a sponge to be built that has a healthy activity of yeast, essentially giving fermentation a head-start on your way to delicious bread. Slightly sour from the long-acting ferment period overnight, but foolproof enough to leave unattended - translation: honestly great for beginners. And yes, I hesitate to call this a true sourdough, because you do start the sponge with commercial yeast, but I think it's cavalier to say that some natural yeast doesn't form in that first phase of fermentation, especially since you only add ~1g per loaf of bread. Shopping List:
Bakers Percentages (for the advanced bakers): 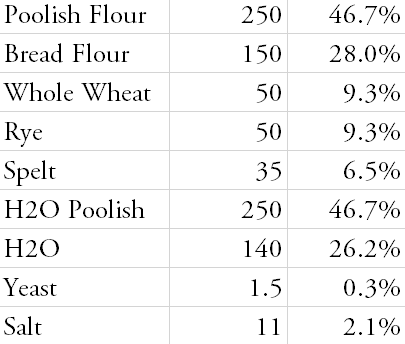
Note: Poolish percentage only includes flour portion by weight. Combined Poolish and H2O is at 100% hydration.
|
TL;DR, there are essentially 6 steps to making the poolish loaf, or any loaf of bread using a pre-ferment method.
|
Prep (creating the poolish):
This is a relatively streamlined process for weekend baking; follow the time guidelines if you want to bake a loaf at 12PM the following day (and don't mind waking up at 6:30-7:00AM).
1930:
Create the poolish by mixing 250 g of AP Flour with 250 g of room temperature water and 0.5 g of yeast. If your scale doesn't have decimal gram precision, scoop out 1/16th of a teaspoon of commercial yeast. Warning: yes, it will look like approximately zero yeast, but there's enough potency in any packet of active-dry yeast to get you going.
Give this a rough mix (your hands work well here, or a rubber spatula, but I prefer hands), and place on your counter covered with plastic wrap (or a tea towel) overnight.
Prep (mixing, gluten development, bulk fermentation, and forming):
0730:
Check for bubbling activity on your poolish. It should look almost like a sourdough starter, or alternatively, the surface of the moon. If you don't see any bubbles pop every few seconds, give it a little warm encouragement. By that, I mean place it into your oven with the light on (should be roughly proofing temperatures near 85-90 deg F) until you see some life, but no longer than an hour.
Mix the ripe poolish with the rest of the ingredients (your mix of flours, the remaining water, salt, and yeast - remember to keep the salt and yeast separate). If you find the poolish is hard to extract from the bowl, use the 140 g of water to loosen it up - which will also aid in mixing it into a cohesive ball of dough. Mix this in a separate clean bowl, with enough room for the dough to breathe, and cover with the tea towel.
And now we wait for bulk fermentation, interrupting to fold the dough to form gluten in the loaf. This is your replacement for having to knead a ball of dough and get that arm workout in, and almost serves as another autolyse process where water and enzymes in the flour start to break down the flour and encourage gluten development automatically. We fold the dough twice over the span of 1 hour and then leave it to prove for 2 more hours.
0800:
Fold 1. Working your way around the bowl (you'll do this about every 30-45 degrees angularly), pinch a 'corner' of the ball and pull it up and to the center of the ball, and press into the middle. Repeat this all the way around - and it will be sticky, so feel free to gently wet down your hands to make it easy - the excess hydration is negligible. Don't be tempted to flip the ball over - else you'll completely unfurl the gluten strands that you've just made by pulling on the next fold. Re-cover and wait 30 minutes.
0830:
Fold 2. The second fold is ALWAYS easier as the dough strengthens with gluten. You will probably feel a noticeable difference in the texture of the dough, even at this point. Re-cover and let your long 2 hour fermentation begin. You can do this on the counter top unless it's the dead of winter, in which you'll want that slightly above room temperature ambiance for peak BF.
1030-1100:
Prepare your proofing banneton (or other mixing bowl) by dusting it with flour. Rice flour works great here as it doesn't scorch as fast as AP flour, but it isn't necessary.
On a very lightly dusted surface, shape your loaf. To do this, you'll use both hands to cup the ball of dough around its edges as you work it in circles to tighten it up. Sort of illogically, you want a little bit of stickiness to the counter, as this friction will help pull the dough together. This step honestly takes practice, and if you're not getting a tight ball, it's not the end of the world.
Place the ball into your banneton or other proofing vessel with the side that was on the counter now facing up. Cover with a tea towel to proof for 1 hour.
As soon as you're done with that, start preheating your oven to 475 deg F with the Dutch oven in it with the lid on. You can also take this time to cut out a square of parchment paper to transfer your dough to the oven.
The Business (the bake):
1200:
Turn your dough out from the proofing banneton onto your parchment paper and give it a score with a razor blade. Avoid cutting perpendicularly to the surface of the ball, as this won't leave with you a good ear when the loaf springs in the oven. Get creative with the scoring, and know that there's no real mistakes to be made, only happy accidents.
Carefully transfer the loaf and parchment paper to the Dutch oven, place the lid on top and bake at 475 deg F for 30 minutes. Remove the lid and continue baking for 15 minutes, but keep an eye on it after 10 in case your oven runs a bit hot. You don't want to set off the fire alarm for the 9th time this month, do you?
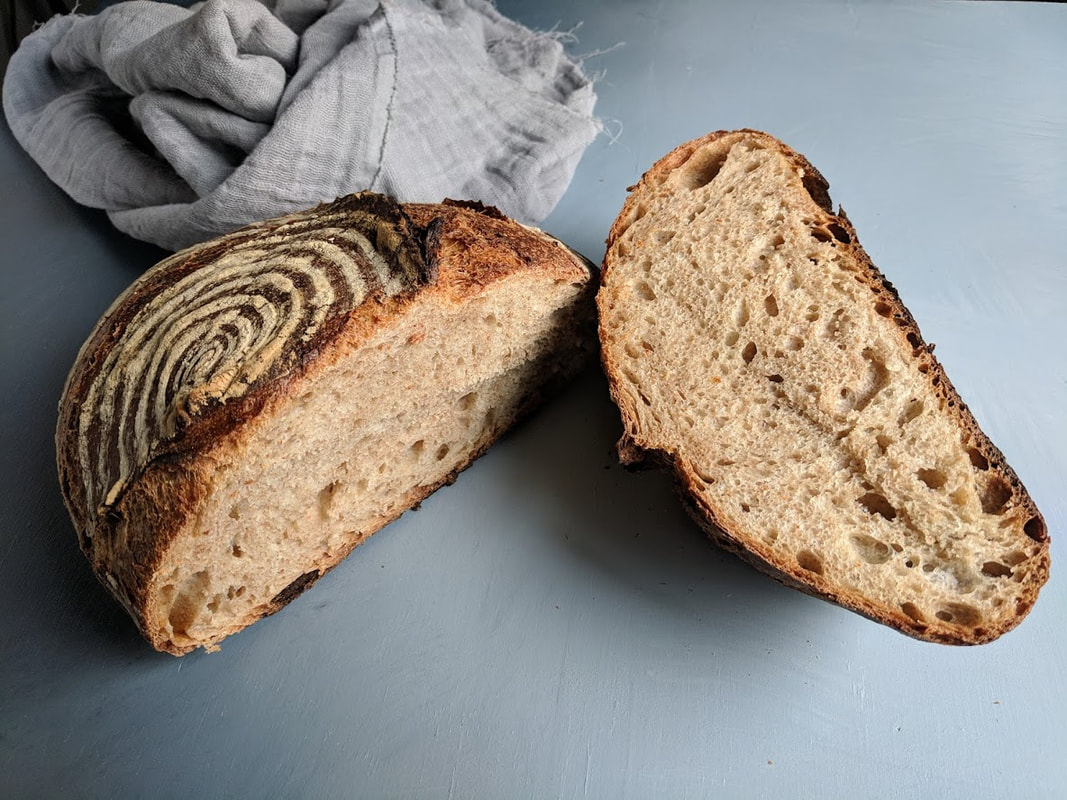
Carefully remove from the dutch oven and allow to cool at least 1 hour on a wire rack - this allows air to circulate under it and discourages condensation forming on the bottom of the loaf, giving you a soggy crust.
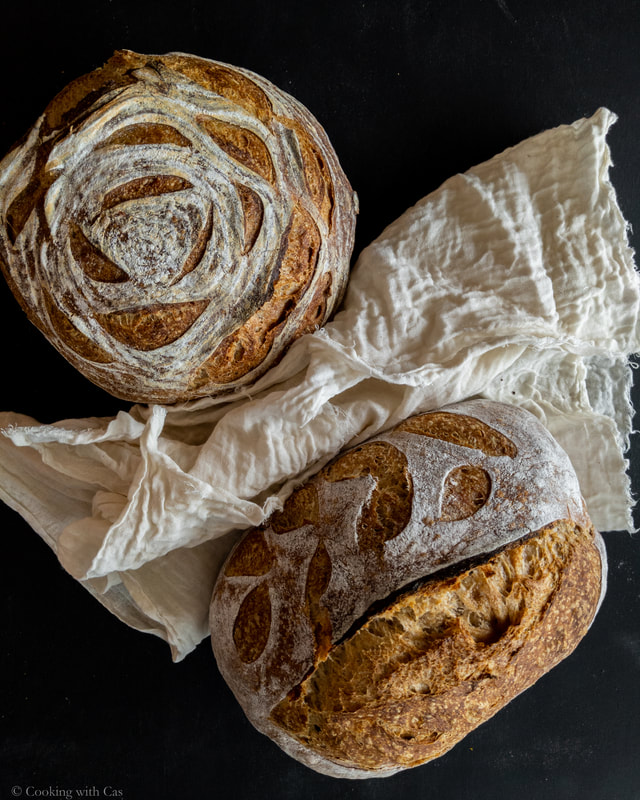
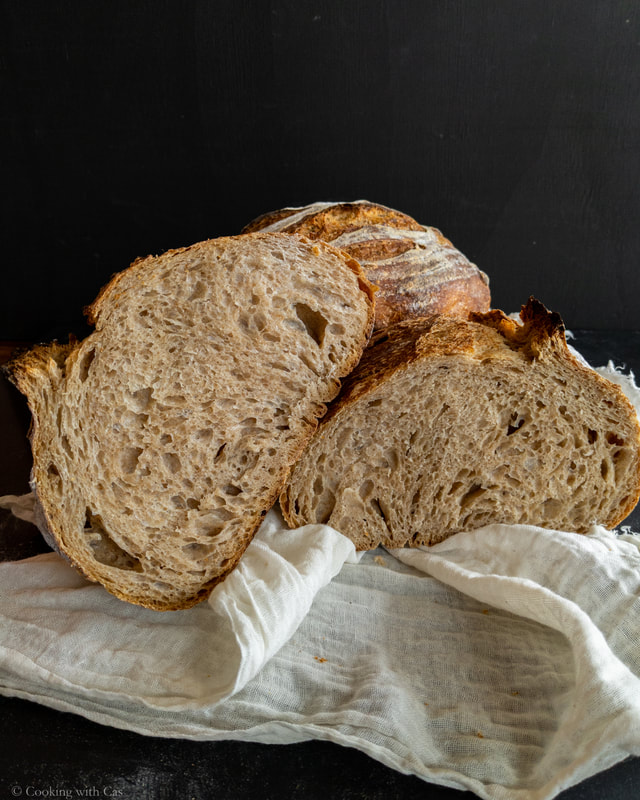
Now, marvel at what you've done. Get some crumb shots, post it on Instagram, spread some butter, honey, avocado, whatever you desire.
This is a relatively streamlined process for weekend baking; follow the time guidelines if you want to bake a loaf at 12PM the following day (and don't mind waking up at 6:30-7:00AM).
1930:
Create the poolish by mixing 250 g of AP Flour with 250 g of room temperature water and 0.5 g of yeast. If your scale doesn't have decimal gram precision, scoop out 1/16th of a teaspoon of commercial yeast. Warning: yes, it will look like approximately zero yeast, but there's enough potency in any packet of active-dry yeast to get you going.
Give this a rough mix (your hands work well here, or a rubber spatula, but I prefer hands), and place on your counter covered with plastic wrap (or a tea towel) overnight.
Prep (mixing, gluten development, bulk fermentation, and forming):
0730:
Check for bubbling activity on your poolish. It should look almost like a sourdough starter, or alternatively, the surface of the moon. If you don't see any bubbles pop every few seconds, give it a little warm encouragement. By that, I mean place it into your oven with the light on (should be roughly proofing temperatures near 85-90 deg F) until you see some life, but no longer than an hour.
Mix the ripe poolish with the rest of the ingredients (your mix of flours, the remaining water, salt, and yeast - remember to keep the salt and yeast separate). If you find the poolish is hard to extract from the bowl, use the 140 g of water to loosen it up - which will also aid in mixing it into a cohesive ball of dough. Mix this in a separate clean bowl, with enough room for the dough to breathe, and cover with the tea towel.
And now we wait for bulk fermentation, interrupting to fold the dough to form gluten in the loaf. This is your replacement for having to knead a ball of dough and get that arm workout in, and almost serves as another autolyse process where water and enzymes in the flour start to break down the flour and encourage gluten development automatically. We fold the dough twice over the span of 1 hour and then leave it to prove for 2 more hours.
0800:
Fold 1. Working your way around the bowl (you'll do this about every 30-45 degrees angularly), pinch a 'corner' of the ball and pull it up and to the center of the ball, and press into the middle. Repeat this all the way around - and it will be sticky, so feel free to gently wet down your hands to make it easy - the excess hydration is negligible. Don't be tempted to flip the ball over - else you'll completely unfurl the gluten strands that you've just made by pulling on the next fold. Re-cover and wait 30 minutes.
0830:
Fold 2. The second fold is ALWAYS easier as the dough strengthens with gluten. You will probably feel a noticeable difference in the texture of the dough, even at this point. Re-cover and let your long 2 hour fermentation begin. You can do this on the counter top unless it's the dead of winter, in which you'll want that slightly above room temperature ambiance for peak BF.
1030-1100:
Prepare your proofing banneton (or other mixing bowl) by dusting it with flour. Rice flour works great here as it doesn't scorch as fast as AP flour, but it isn't necessary.
On a very lightly dusted surface, shape your loaf. To do this, you'll use both hands to cup the ball of dough around its edges as you work it in circles to tighten it up. Sort of illogically, you want a little bit of stickiness to the counter, as this friction will help pull the dough together. This step honestly takes practice, and if you're not getting a tight ball, it's not the end of the world.
Place the ball into your banneton or other proofing vessel with the side that was on the counter now facing up. Cover with a tea towel to proof for 1 hour.
As soon as you're done with that, start preheating your oven to 475 deg F with the Dutch oven in it with the lid on. You can also take this time to cut out a square of parchment paper to transfer your dough to the oven.
The Business (the bake):
1200:
Turn your dough out from the proofing banneton onto your parchment paper and give it a score with a razor blade. Avoid cutting perpendicularly to the surface of the ball, as this won't leave with you a good ear when the loaf springs in the oven. Get creative with the scoring, and know that there's no real mistakes to be made, only happy accidents.
Carefully transfer the loaf and parchment paper to the Dutch oven, place the lid on top and bake at 475 deg F for 30 minutes. Remove the lid and continue baking for 15 minutes, but keep an eye on it after 10 in case your oven runs a bit hot. You don't want to set off the fire alarm for the 9th time this month, do you?
Carefully remove from the dutch oven and allow to cool at least 1 hour on a wire rack - this allows air to circulate under it and discourages condensation forming on the bottom of the loaf, giving you a soggy crust.
Now, marvel at what you've done. Get some crumb shots, post it on Instagram, spread some butter, honey, avocado, whatever you desire.
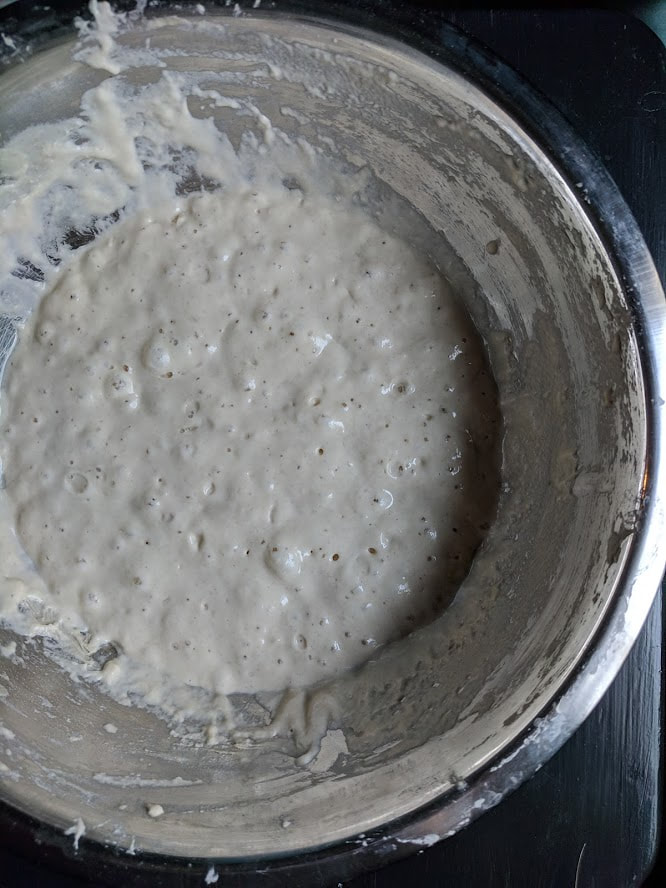
Poolish pre-ferment - note the bubbles.
|
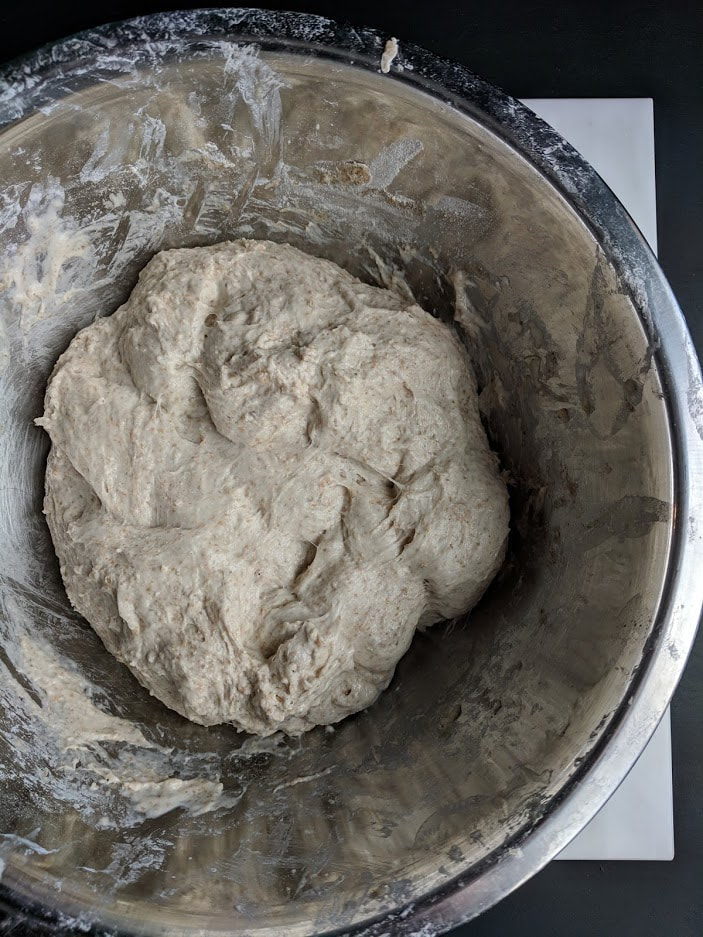
After folding the poolish into the remaining flour and water - note shagginess.
|
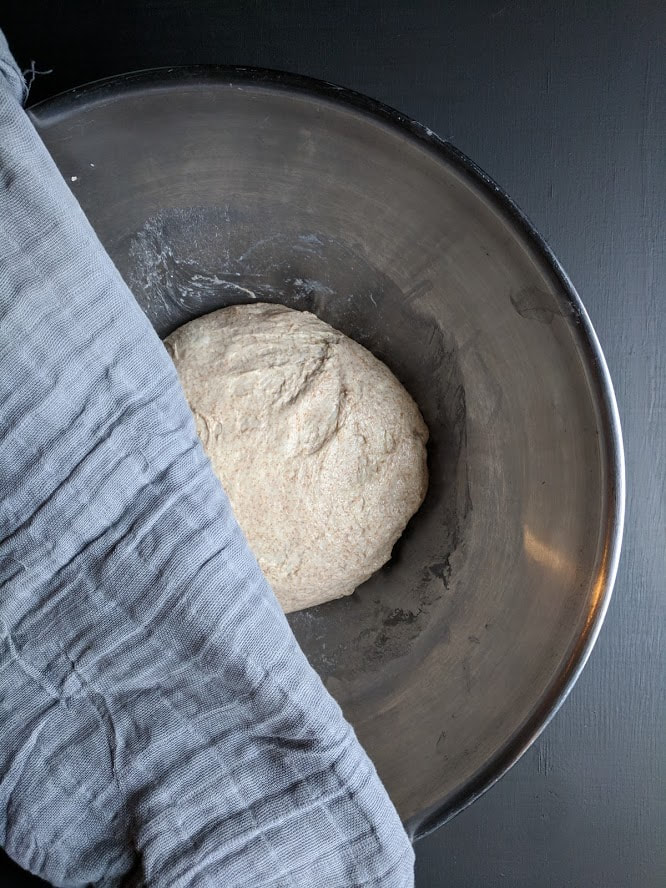
After 2 folds, the ball of dough is much more cohesive - note I did transfer it to a new bowl.
|